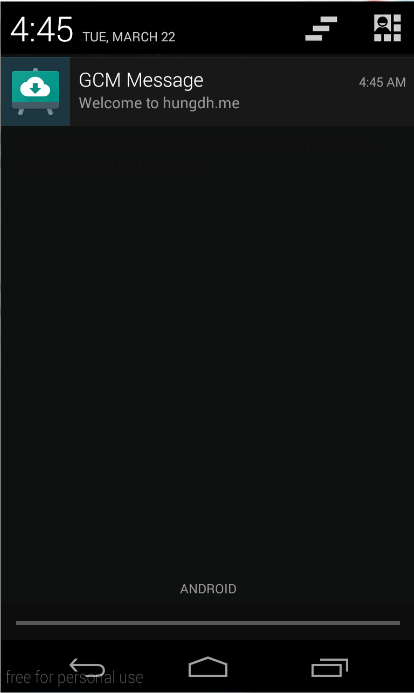
Ở phần một, mình đã giới thiệu GCM và hướng dẫn xây dựng được server side, phần tiếp theo sẽ là xây dựng client side. Let’s go!
Để tiếp tục phần hai, hãy chắc chắn bạn đã hoàn thành phần một (đã có file google-service.json trong thư mục app của project).
1. Khai báo thư viện
- Tiến hành mở file build.gradle của
appvà khai báo như sau:
apply plugin: 'com.google.gms.google-services'
dependencies {
  compile "com.google.android.gms:play-services-gcm:8.4.0"
}
- Tiếp tục mở file build.gradle của
project
dependencies {
    classpath 'com.android.tools.build:gradle:1.5.0'
    classpath 'com.google.gms:google-services:2.0.0-alpha3'
}
Sau đó, tiến hành rebuild lại Project.
2. Khai báo GCM permission
Ứng dụng cần truy cập Internet và wake lock để gửi, nhận thông báo từ GCM server.
<manifest package="com.hungdh.gcmdemo">
  <uses-permission android:name="android.permission.INTERNET" />
  <uses-permission android:name="android.permission.WAKE_LOCK" />
  <uses-permission android:name="com.google.android.c2dm.permission.RECEIVE" />
  <permission android:name="com.hungdh.gcmdemo.permission.C2D_MESSAGE"
      android:protectionLevel="signature" />
  <uses-permission android:name="com.hungdh.gcmdemo.permission.C2D_MESSAGE" />
</manifest>
3. Code, code, và code
Cấu trúc chương trình: ngoài class Main ra thì ta cần 3 class với chức năng như sau:
-
RegistrationIntentService.java: một IntentService tiến hành tạo token và đăng kí token đó cho server mà ta đã xây dựng.
-
MyInstanceIDListenerService.java: khi token thay đổi, sẽ gọi đến nó với phương thức
onTokenRefresh. -
MyGcmListenerService.java: lắng nghe các thông tin từ GCM server (không phải server của ta tự xây dựng đâu) với phương thức
onMessageReceived.
RegistrationIntentService.java
Như đã giới thiệu ở trên, class này sẽ tạo một instance ID từ Google và nó là duy nhất cho thiết bị và ứng dụng của bạn.
@Override
protected void onHandleIntent(Intent intent) {
    ...
    // [START get token]
    InstanceID instanceID = InstanceID.getInstance(this);
    String token = instanceID.getToken(getString(R.string.gcm_defaultSenderId),
                    GoogleCloudMessaging.INSTANCE_ID_SCOPE, null);
    // [END get_token]
    Log.i(TAG, "GCM Registration Token: " + token);
    ...
}
Giả sử yêu cầu này là thành công, bạn sẽ có một token. Và khi đó, ta sẽ tiến hành đăng kí token này lên server do chúng ta xây dựng với các tham số như đã xây dựng trong bảng gcm_users bằng phương thức sendRegistrationToServer.
Hãy nhớ đăng kí service này trong AndroidManifest.xml
</application>
    ...
    <service
        android:name=".RegistrationIntentService"
        android:exported="false">
    </service>
	...
</application>
MyInstanceIDListenerService.java
Theo tài liệu chính thức của Google, InstanceID sẽ có hạn sử dụng tối đa là 6 tháng. Để khắc phục điều này, ta cần extend từ InstanceIDListenerService để xử lý những thay đổi khi refresh token. Vì vậy, ta nên tạo MyInstanceIDListenerService.java để chạy RegistrationIntentService - giúp chúng ta lấy được token mới.
public class MyInstanceIDListenerService extends InstanceIDListenerService {
    @Override
    public void onTokenRefresh() {
        // Fetch updated Instance ID token and notify of changes
        Intent intent = new Intent(this, RegistrationIntentService.class);
        startService(intent);
    }
}
</application>
    <!-- [START instanceId_listener] -->
    <service
        android:name=".MyInstanceIDListenerService"
        android:exported="false">
        <intent-filter>
            <action android:name="com.google.android.gms.iid.InstanceID"/>
        </intent-filter>
    </service>
    <!-- [END instanceId_listener] -->
</application>
Tạo Broadcast Receiver và Message Handler
Khai báo trong AndroidManifest.xml:
<receiver
  android:name="com.google.android.gms.gcm.GcmReceiver"
  android:exported="true"
  android:permission="com.google.android.c2dm.permission.SEND" >
  <intent-filter>
     <action android:name="com.google.android.c2dm.intent.RECEIVE" />
     <category android:name="com.codepath.gcmquickstart" />
  </intent-filter>
</receiver>
MyGcmListenerService.java
Tạo file MyGcmListenerService.java được extends từ GcmListenerService - sẽ xử lý việc nhận các thông báo từ phía GCM server:
public class MyGcmListenerService extends GcmListenerService {

    private static final String TAG = "MyGcmListenerService";

    // [START receive_message]
    @Override
    public void onMessageReceived(String from, Bundle data) {
        String message = data.getString("message");
        Log.d(TAG, "From: " + from);
        Log.d(TAG, "Message: " + message);

        sendNotification(message);
        // [END_EXCLUDE]
    }
    // [END receive_message]

    private void sendNotification(String message) {
        Intent intent = new Intent(this, MainActivity.class);
        intent.addFlags(Intent.FLAG_ACTIVITY_CLEAR_TOP);
        PendingIntent pendingIntent = PendingIntent.getActivity(this, 0, intent,
                PendingIntent.FLAG_ONE_SHOT);

        Uri defaultSoundUri = RingtoneManager.getDefaultUri(RingtoneManager.TYPE_NOTIFICATION);
        NotificationCompat.Builder notificationBuilder = new NotificationCompat.Builder(this)
                .setSmallIcon(R.mipmap.ic_launcher)
                .setContentTitle("GCM Message")
                .setContentText(message)
                .setAutoCancel(true)
                .setSound(defaultSoundUri)
                .setContentIntent(pendingIntent);

        NotificationManager notificationManager =
                (NotificationManager) getSystemService(Context.NOTIFICATION_SERVICE);

        notificationManager.notify(0 /* ID of notification */, notificationBuilder.build());
    }
}
Và không thể thiếu phần đăng kí service cho class
<service
android:name=".MyGcmListenerService"
android:exported="false" >
    <intent-filter>
        <action android:name="com.google.android.c2dm.intent.RECEIVE" />
    </intent-filter>
</service>
MainActivity.java
4. Demo
Truy cập vào giao diện quản lý của server. Viết nội dung và gửi thông báo cho client.
Source code bạn có thể tham khảo tại đây.
